# Georeference Urban Atlases with Allmaps
LMEC-specific instructions
While we've made this documentation publicly available, please note that it contains LMEC-specific instructions, and may not be exactly replicable across institutions.
This documentation contains step-by-step instructions on creating the underlying data sources for Atlascope v2, the Leventhal Center's tool for exploring historic urban atlases across Massachusetts.
There are many ways to georeference maps. Because we will be georeferencing online using Allmaps Editor, there are no system or software requirements, though it is recommended that you always use the most up-to-date web browser to avoid any buggy behavior.
# Checklist & Table of Contents
The software stack for this process
Nothing needs to be downloaded! You will, however, use the following websites:
- Allmaps Editor: mask and georeference atlas plates
- Allmaps Viewer and/or Observable: peer inspection
- Airtable: the single source of truth for managing georeferencing progress
- Step 1: Updating metadata in Airtable
- Step 2: Load your atlas into Allmaps
- Step 3: Masking
- Step 4: Creating groud control points
- Step 5: Inspection
# Step 1: Updating metadata in Airtable 
At LMEC, we use the Airtable base Atlascope Geotransformation Progress as the single source of truth for progress in Atlascope georeferencing. This is where you'll find which atlases have been assigned to you. There are three views, but Grouped by User will be the easiest for tracking your georeferencing progress.
Lots of the metadata in this Airtable base is populated by LMEC's running list of digitized atlases. Those metadata fields (e.g., barcode, geo_extent2, desc_short) are not editable. However, there are a number of fields we will update as we make progress on georeferencing various atlases. The ones
Metadata overview
who_georefdescribes which LMEC staff member is assigned to an atlaswho_checktracks which LMEC staff memnber is assigned to the Peer Inspection step for an atlasgeoref_statusindicates the georeferencing progress for an atlasmulti_townsindicates whether the atlas contains multiple towns or a single townplate_flagsis used to temporarily flag issues in a corresponding atlas plate for the peer inspection phasectrl_pointsindicates the progress of creating ground control points for an atlas
# Before proceeding to Step 2, confirm the who_georef, who_check, georef_status, and multi_towns fields are correct
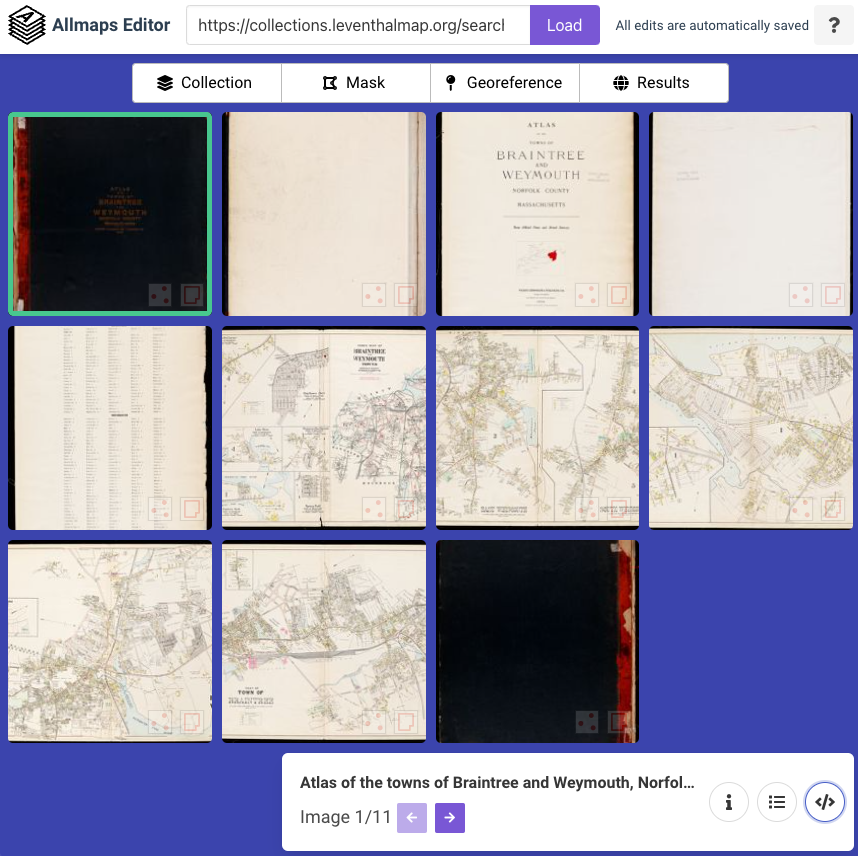
# Step 2: Load your atlas into Allmaps
# Importing via manifest
Once you've selected an atlas to work on, load it into Allmaps using its IIIF manifest.
We'll use this 11-sheet atlas of Braintree and Weymouth as an example, but feel free to follow along with any atlas you like.
To get started, simply copy and paste the IIIF manifest into Allmaps Editor input box. In LMEC collections, IIIF manifests are always an object's URL suffixed with /manifest.
For example, the IIIF manifest of
https://collections.leventhalmap.org/search/commonwealth:j3862x39j
is
https://collections.leventhalmap.org/search/commonwealth:j3862x39j/manifest
The atlas may take a minute to load, but once it has, you should see something like this:
 |
|---|
# Step 3: Masking
# What is masking?
Masking is the process of identifying the part of a scanned image that you actually want to georeference. It usually involves drawing a polygon around any geographic material in a map. As you georeference atlases, there are two kinds of masking that you'll commonly encounter:
- Masking to remove non-geographic content, such as the margins of a page. This kind of mask will be present on almost everything you georeference.
- Masking to partition a map containing distinct geographic areas which must be georeferenced separately.
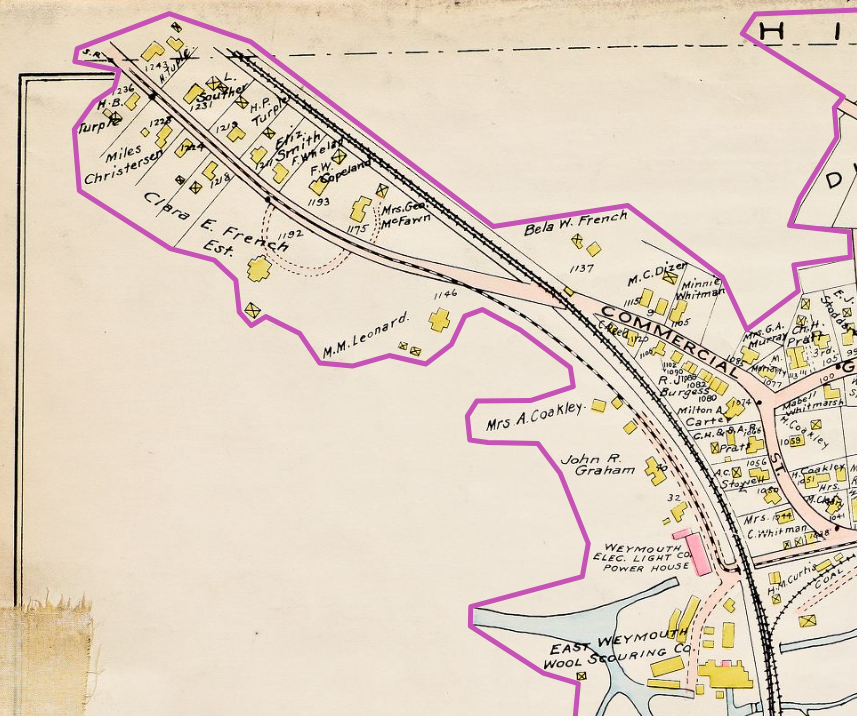
Since this atlas contains many sheets of front matter with no cartographic detail, like title and copyright pages, we don't need to worry about masking or georeferencing those.
# Start masking
To begin, click on the ![]() button on the banner at the top of Allmaps Editor
button on the banner at the top of Allmaps Editor
Draw the mask polygon by clicking a point on the map. You can move an existing point by clicking, holding, and dragging. When you're done, you can double-click anywhere, or you can single-click on the first point in the polygon.
You should make one mask per distinct geographic area depicted in the atlas. Since this plate contains two areas, we'll make two masks.
 |
|---|
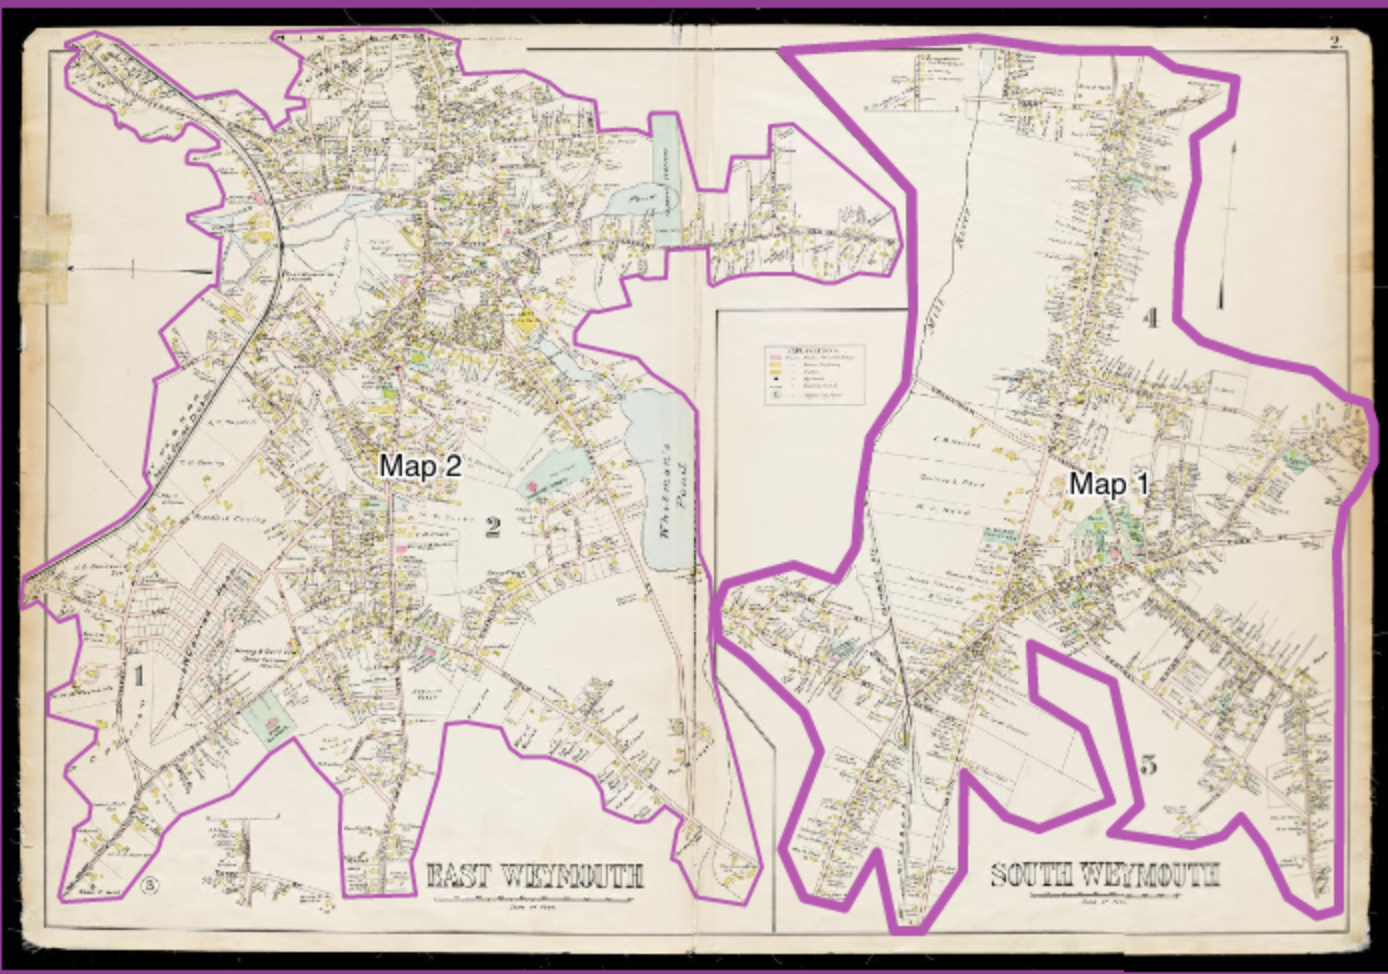
Handling index maps
Like most atlases, this atlas contains an index page (image 6/11). When georeferencing for Atlascope, you often won't have to georeference the index map of an Atlas. You should only georeference part of an index map if it is of fairly large scale (e.g., between 50 feet:1 inch and 200 feet:1 inch).
This index page contains many map insets. Since some of them are large scale, such as the Lake View inset in the Town of Weymouth, we might choose to mask and georeference that, while choosing not to mask and georeference others for the purpose of Atlascope.
Because this page has two inset maps, we made two masks.
# Best practices while masking
Generally, you should follow these two principles when masking atlas plates:
- When possible, exclude non-cartographic data such as north arrows, legends, and blank spaces
- Draw masks as closely as possible to the outermost cartographic data in the map
As you mask, consider the following:
- If you were using Atlascope to conduct research in this area, what features would you want to be preserved?
- Empty space on the map doesn't always mean empty space in the territory. There's was likely something there in real life, but it's not always easy to tell how this should impact your mask. If you aren't sure where to stop drawing your mask, check in with a colleague.
# Example
In this section of our atlas of Braintree and Weymouth, there was a lot of "empty space." We created a mask that followed the outermost cartographic data and excluded what "empty space" we could.
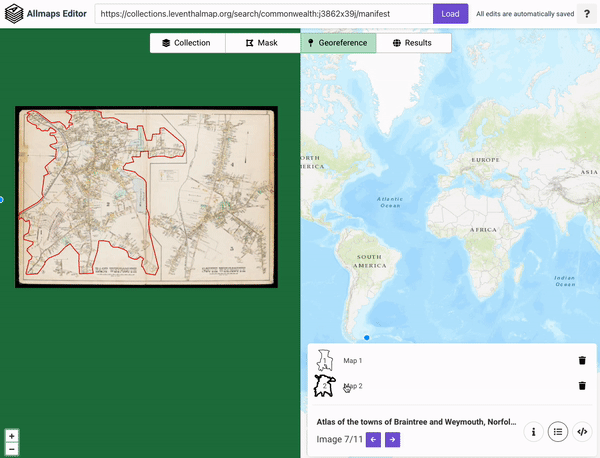
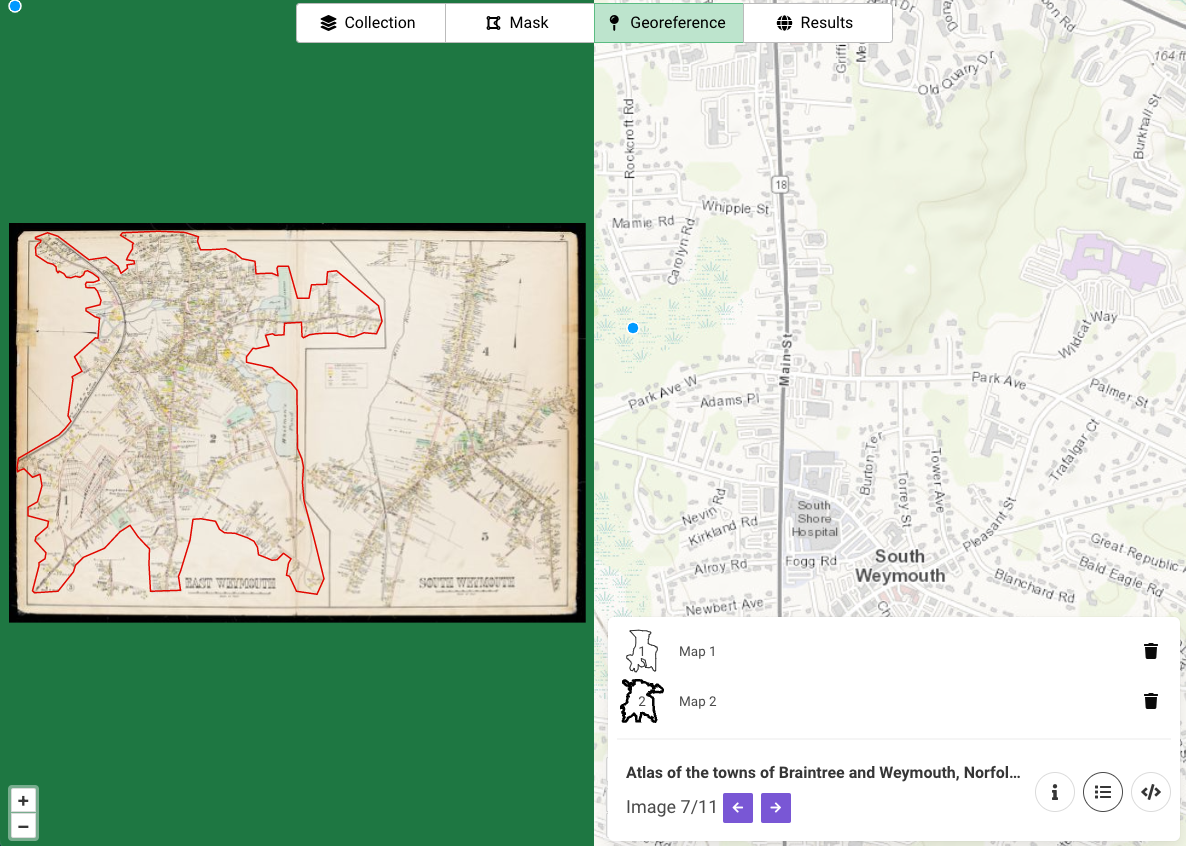
# Step 4: Creating ground control points (GCPs)
To get started, tab over to the ![]() button in Allmaps.
button in Allmaps.
You should see a screen like this:
 |
|---|
| The Georeference tab in Allmaps Editor |
# What are GCPs?
Ground control points (GCPs) provide instructions for Allmaps to overlay the scanned atlas plate in the left-hand side of the screen upon a real geography in the right-hand side of the screen.
To do so, identify a place that you can guarantee is the same in both sides of the screen—perhaps a street intersection that hasn't changed, or a building corner that's still there. Then click that point on both sides of the screen.
# Best practices for creating GCPs
- Avoid water bodies—they change too much over time to trust for georeferencing
- Roads and buildings are useful—as long as roads and buildings haven't been torn down or paved over, these are your safest bet for identifying a shared location between past and present
- Check your progress—sometimes it only takes a few points to successfully georeference a map. Furthermore, adding too many points can actually create undesirable distortions in the warped image. As you georeference your map, check your progress along the way (for example, maybe at 5 GCPs and again at 10 GCPs)
- Add plate flags in the Airtable—if you're unsure about or encounter any problems with an atlas plate, flag it for review during the Inspection phase by adding the image number to the
plate_flagsAirtable field
To check your progress, tab over to the![]() button. You can either:
button. You can either:
- Right-click on
View current imageand selectOpen link in new tab - If on a Mac, hold down
⌘cmdand click onView current image
This will open a new tab in Allmaps Viewer, a separate app in the Allmaps platform where you can view georeferenced plates.
WARNING
As of this writing, Allmaps Viewer is under development and not particularly helpful for checking the accuracy of a warped map. This leaves us with two options for checking our work.
# Development Viewer (recommended)
After opening Allmaps Viewer, simply prefix the URL with dev. such that, for example
https://viewer.allmaps.org/#?image=26a2a2242bb643f1&map=837c72dd4d472679&type=annotation&data=data:text/x-url,https%3A%2F%2Fannotations.allmaps.org%2Fmaps%2F837c72dd4d472679
would become
https://dev.viewer.allmaps.org/#?image=26a2a2242bb643f1&map=837c72dd4d472679&type=annotation&data=data:text/x-url,https%3A%2F%2Fannotations.allmaps.org%2Fmaps%2F837c72dd4d472679
This routes you to the development version of Allmaps Viewer, which actually applies the mask to the warped map.
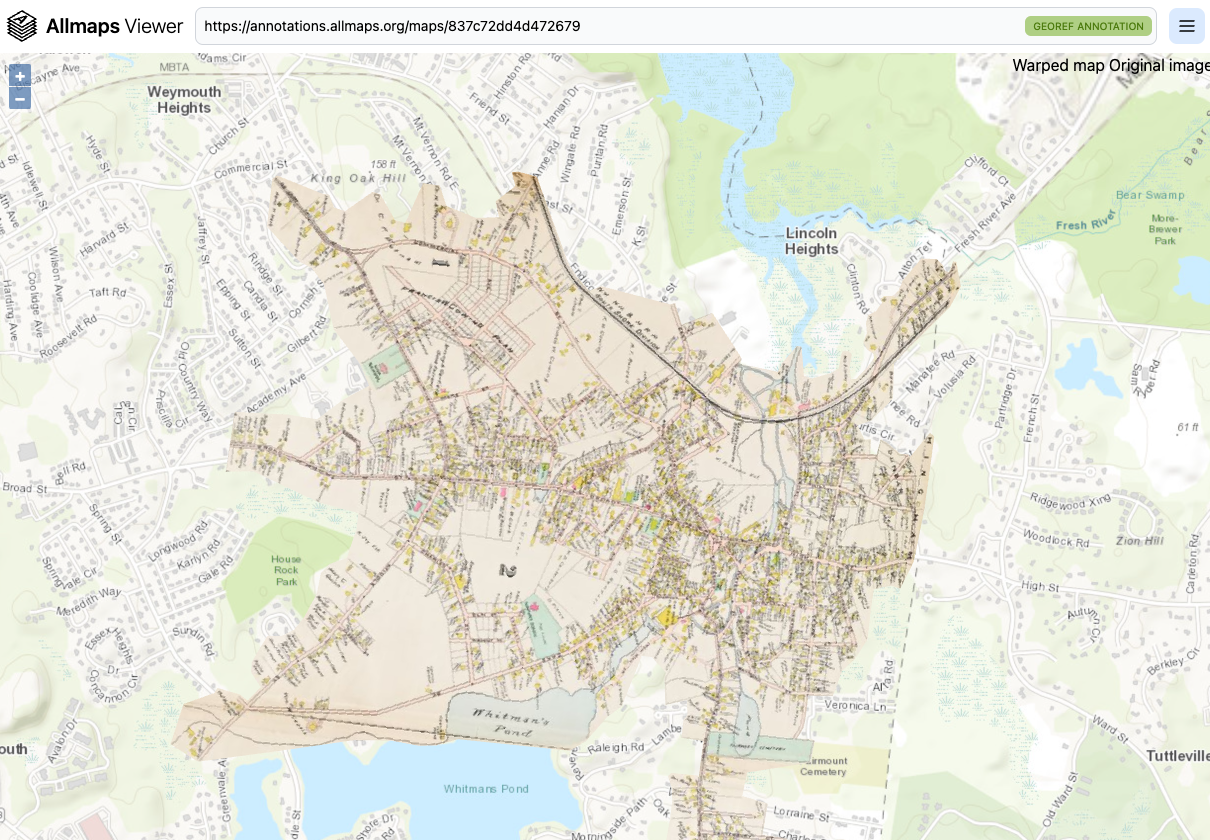 |
|---|
| Allmaps Viewer development view |
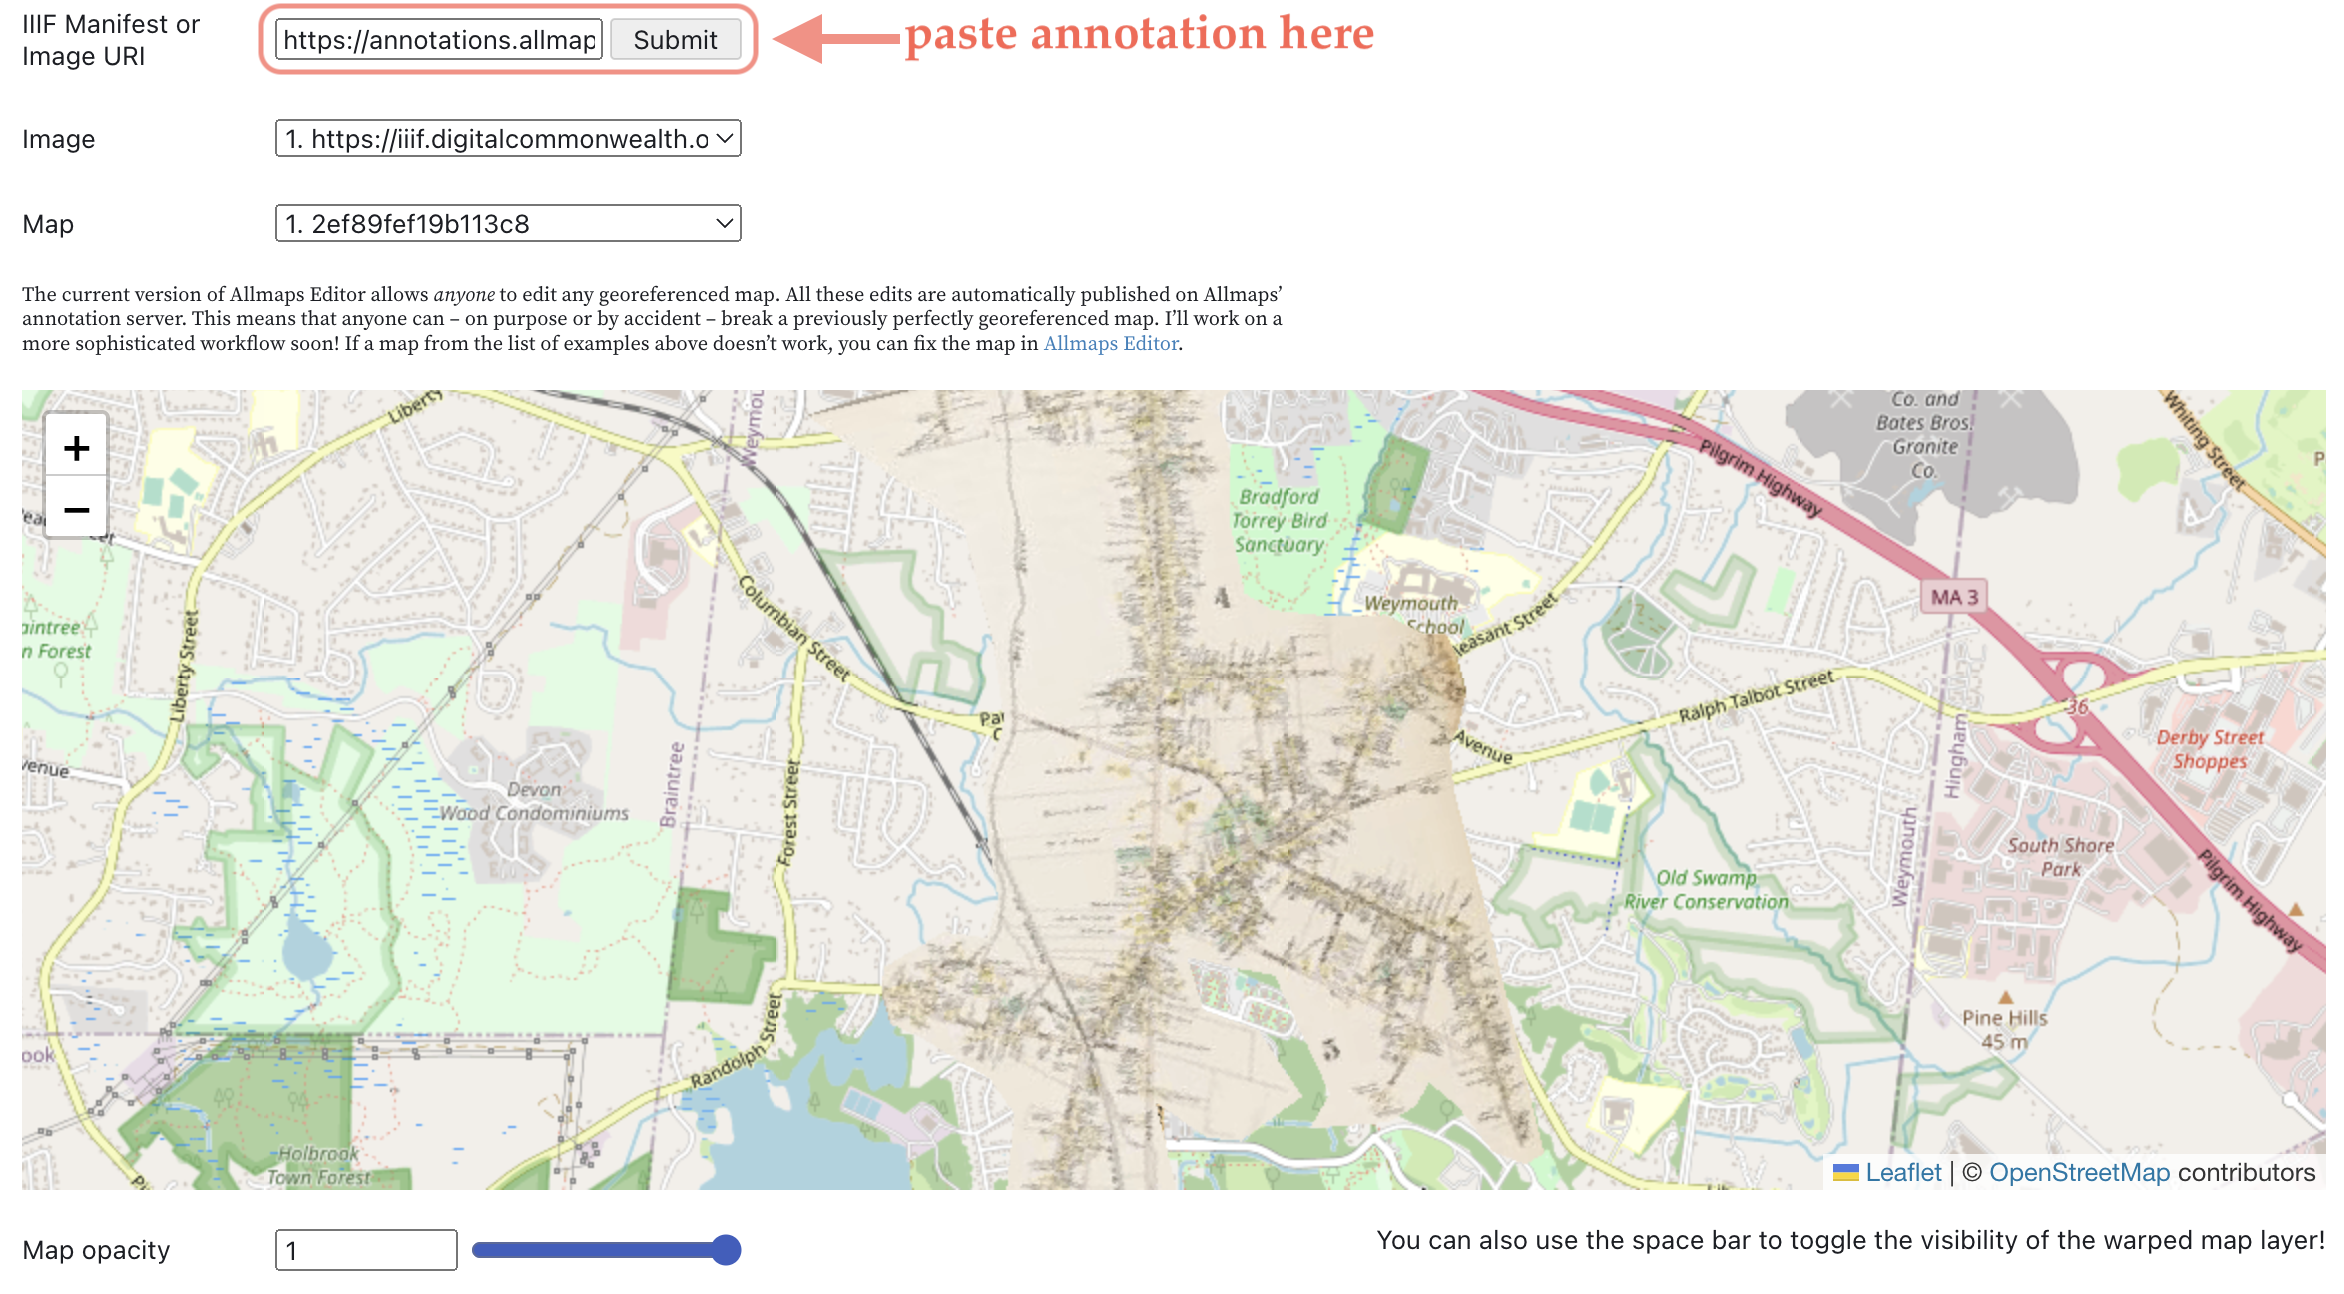
# Observable notebook
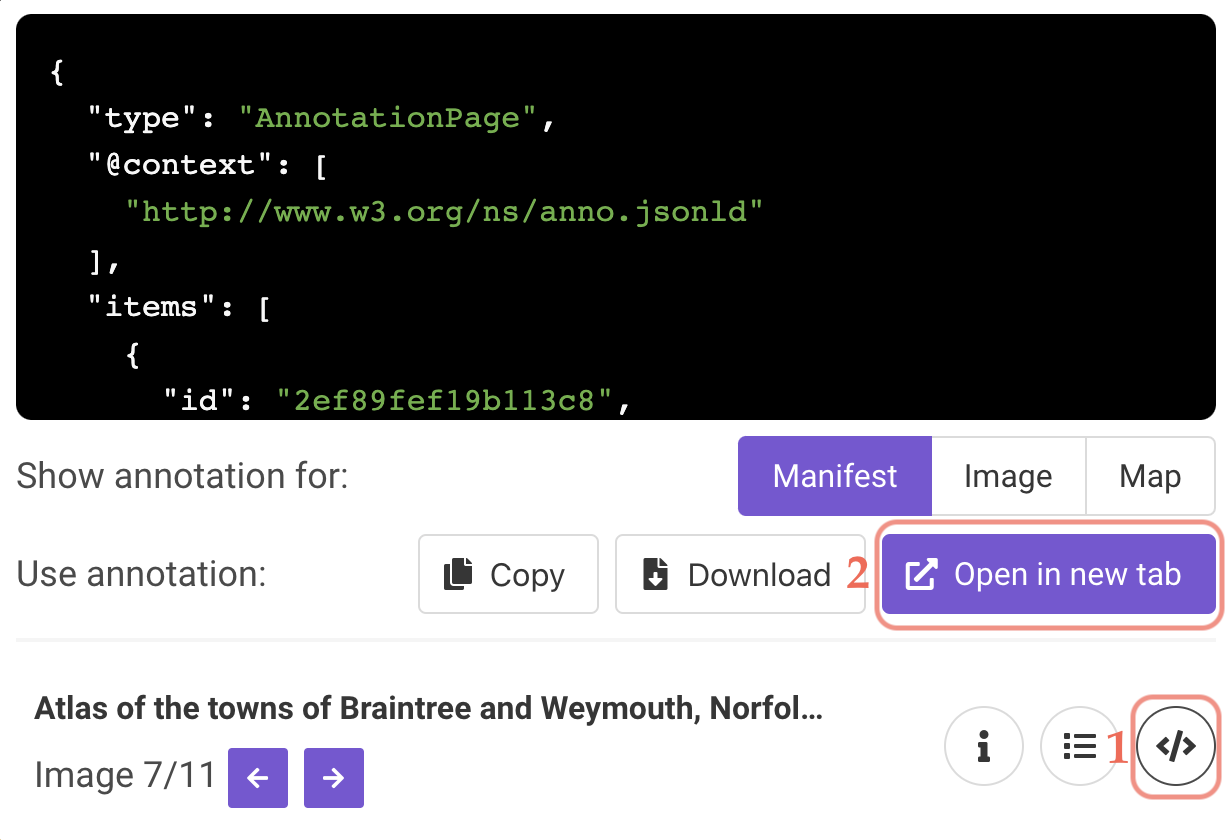
While it requires the extra step of copying a Georeference Annotation, viewing warped maps in Bert Spaan's Observable notebook for the Allmaps Tile Server provides the added bonus of an opacity toggle.
First, grab the Allmaps Georeference Annotation URL by clicking on the![]() button and then clicking
button and then clicking Open in new tab. This will open the Allmaps Georeference Annotation for the map you're currently georeferencing. Copy its URL.
 |
|---|
Then, head over to Bert's Observable notebook for the Allmaps Tile Server and paste that URL into the "IIIF Manifest or Image URI" field.
 |
|---|
Update metadata in Airtable
# Before proceeding to Step 2, update the ctrl_points field to peer inspecting. This will notify your peer inspector that it's time for them to review your work.
# Step 5: Peer inspection
As part of the quality control process, someone else will check your georeferenced maps to see whether any changes should be made to the masks or GCPs before the plates are warped in Step 6.
During peer inspection, pay attention not only to how well atlas plates align to their real-world geography, but to how atlas plates align with one another. Using the plate_flag field, you can mark plates where you find issues.
Issues discovered during peer inspection should be resolved with the primary assignee on that atlas; e.g., if Emily finds lots of errors in the 1880 Attleboro atlas that Ian georeferenced, they should walk through those issues together. In this example, it is still up to Ian to resolve the issues that Emily found.
The peer inspection process is considered complete when both the primary assignee and the peer inspector agree that the warped atlas plates are satisfactorily aligned to their real-world geography and to one another.
Update metadata in Airtable